 Pin It
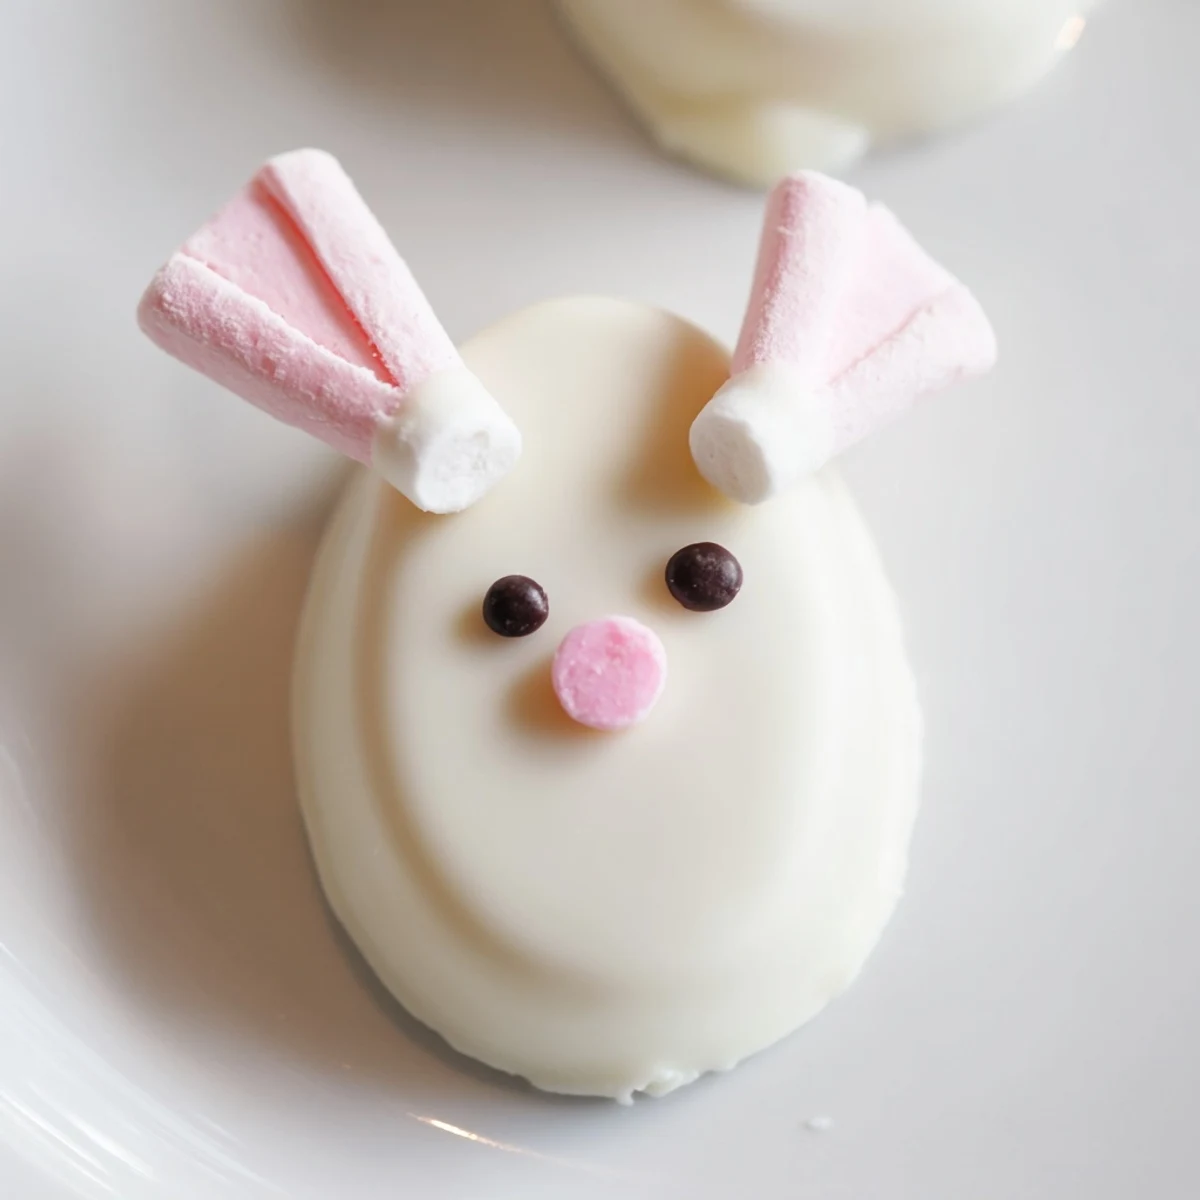
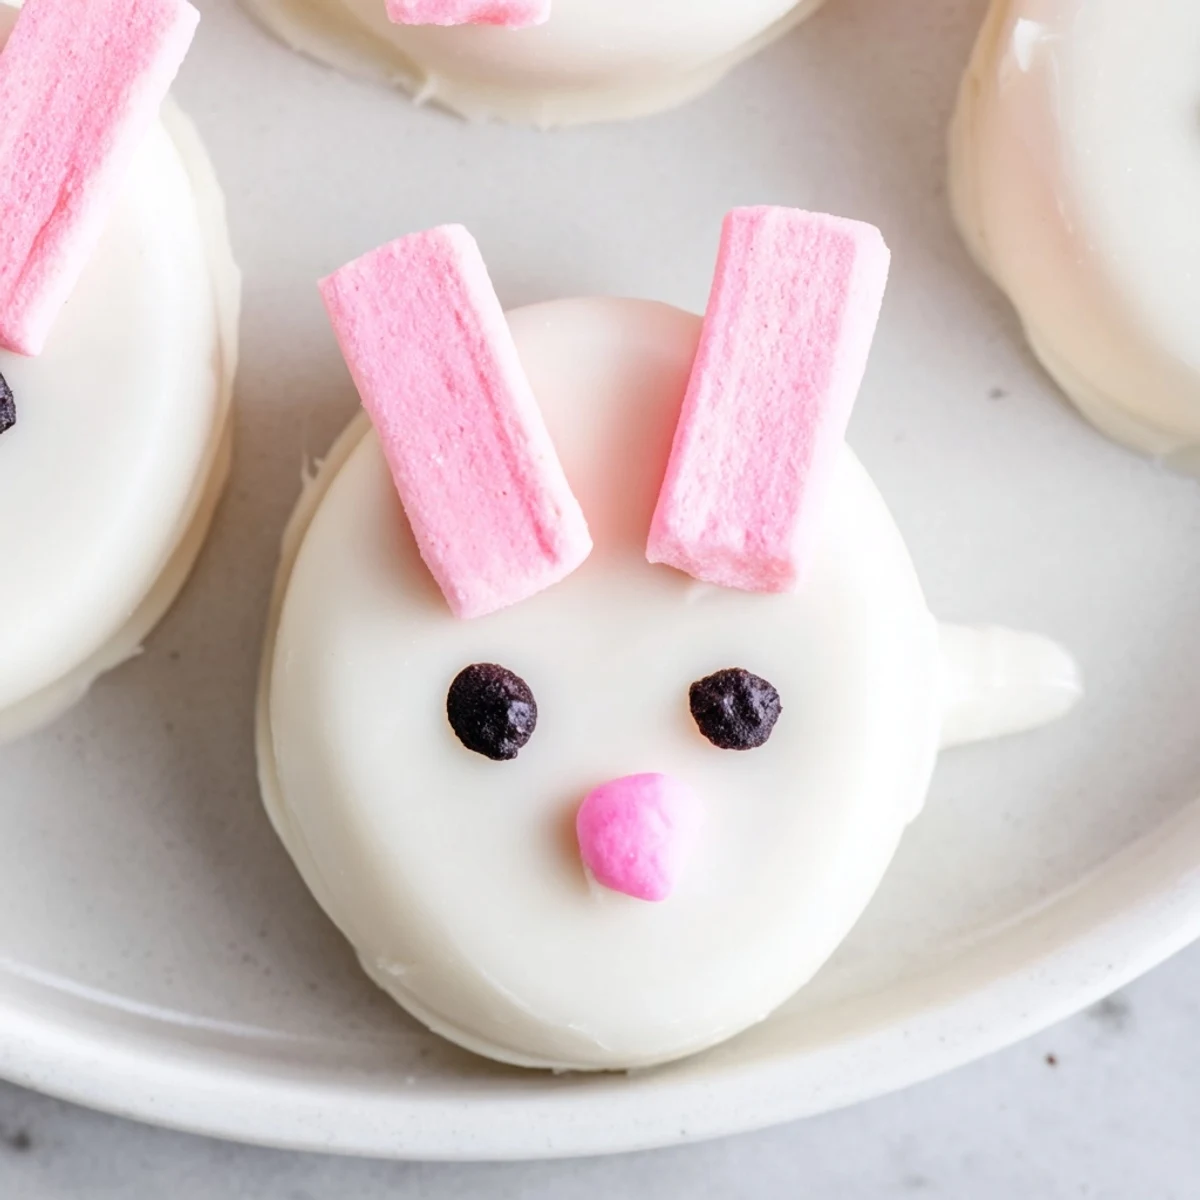
 Create the most adorable spring treats with these chocolate-coated Oreo balls shaped like bunnies. The creamy blend of crushed Oreos and softened cream cheese forms a rich, indulgent center that gets dipped in smooth white chocolate. Each bunny features marshmallow ears, a fluffy tail, pink nose details, and cute eyes drawn with food markers. These festive treats are perfect for Easter gatherings, spring parties, or whenever you want to add some whimsy to your dessert spread. The freezer helps them set perfectly while the white chocolate coating provides a sweet, creamy exterior that complements the crunchy Oreo filling inside.
My kitchen counter looked like a crime scene of marshmallow bits and chocolate splatters, but I could not stop laughing at these tiny bunny faces staring back at me. My seven-year-old had wandered in midway through dipping and immediately declared himself the official ear-attachment specialist, which resulted in approximately half of them looking slightly lopsided but infinitely more charming. We ended up with sticky fingers and a surprising amount of white chocolate in unexpected places.
Last Easter, I brought these to a neighborhood gathering and watched the genuine delight as adults reverted back to childhood excitement over something so simple. One friend actually whispered to me that she had eaten three before anyone even noticed, and I considered that a massive success.
Ingredients
- Oreo cookies: Use regular Oreos rather than Double Stuf because the cream-to-cookie ratio makes for better truffle texture
- Cream cheese: Soften it completely to avoid lumps in your chocolate mixture
- White chocolate or candy melts: Candy melts actually coat more smoothly than real white chocolate
- Mini marshmallows: Fresh marshmallows cut cleaner than stale ones
- Pink candy melts or food coloring: This gives those sweet little bunny noses and ear details
Instructions
- Make the crumb mixture:
- Pulse the Oreos until they turn into fine crumbs, then blend in softened cream cheese until everything comes together into a smooth dough.
- Shape the bunnies:
- Roll tablespoons of dough into balls and gently shape them into slightly oval bunny heads, then freeze them for 30 minutes to firm up.
- Prep the marshmallow parts:
- Cut mini marshmallows in half for tails and slice some into thin slivers for ears.
- Coat in chocolate:
- Melt the white chocolate in 30-second intervals, dip each bunny head completely, and let excess chocolate drip off.
- Attach features:
- While the chocolate is still wet, press marshmallow ears and tails into place.
- Add the faces:
- Use pink candy melts for noses and ear centers, then draw eyes with an edible marker.
- Chill until set:
- Refrigerate for at least 30 minutes to let everything firm up before serving.
 Pin It
 These became an instant tradition after that first year because they somehow manage to be both ridiculous and precious all at once. Now I cannot imagine spring without them.
Making Them Ahead
I have learned through experience that these freeze beautifully for up to a month if you need to get ahead of holiday madness.
Getting Creative
Sometimes I swap in chocolate Oreos or add a splash of vanilla extract to the filling for something a little different.
Common Questions
Most people ask about the chocolate seizing up, which honestly happens to everyone sometimes.
- Can I use milk chocolate instead
- What if I do not have a food processor
- How long will they stay fresh
 Pin It
 Hope your kitchen ends up as cheerfully chaotic as mine always does.
Common Questions
- → How long do bunny Oreo balls stay fresh?
-
Store these in an airtight container in the refrigerator for up to 5 days. The chocolate coating stays firm and the filling remains creamy and delicious throughout this storage period.
- → Can I make these ahead of time for a party?
-
Absolutely! These actually taste better after chilling overnight, which allows the flavors to meld. Prepare them 1-2 days in advance and keep refrigerated until serving time.
- → What's the best way to melt the white chocolate?
-
Melt white chocolate or candy melts in a microwave-safe bowl in 30-second intervals, stirring thoroughly between each interval. This prevents scorching and ensures smooth, evenly melted coating.
- → Can I use different types of chocolate?
-
Yes! While white chocolate provides that classic bunny look, you can use milk or dark chocolate for variation. Just keep in mind that darker chocolate will show the marshmallow features differently.
- → Why freeze the balls before dipping?
-
Freezing for 30 minutes firms up the Oreo mixture, making it easier to handle and preventing balls from falling apart during the dipping process. Cold balls also help the chocolate set faster.
- → What if I don't have a food processor?
-
Place Oreos in a sealed plastic bag and crush with a rolling pin or heavy object until fine crumbs form. Mix with cream cheese by hand in a bowl until fully combined and dough-like.