 Pin It
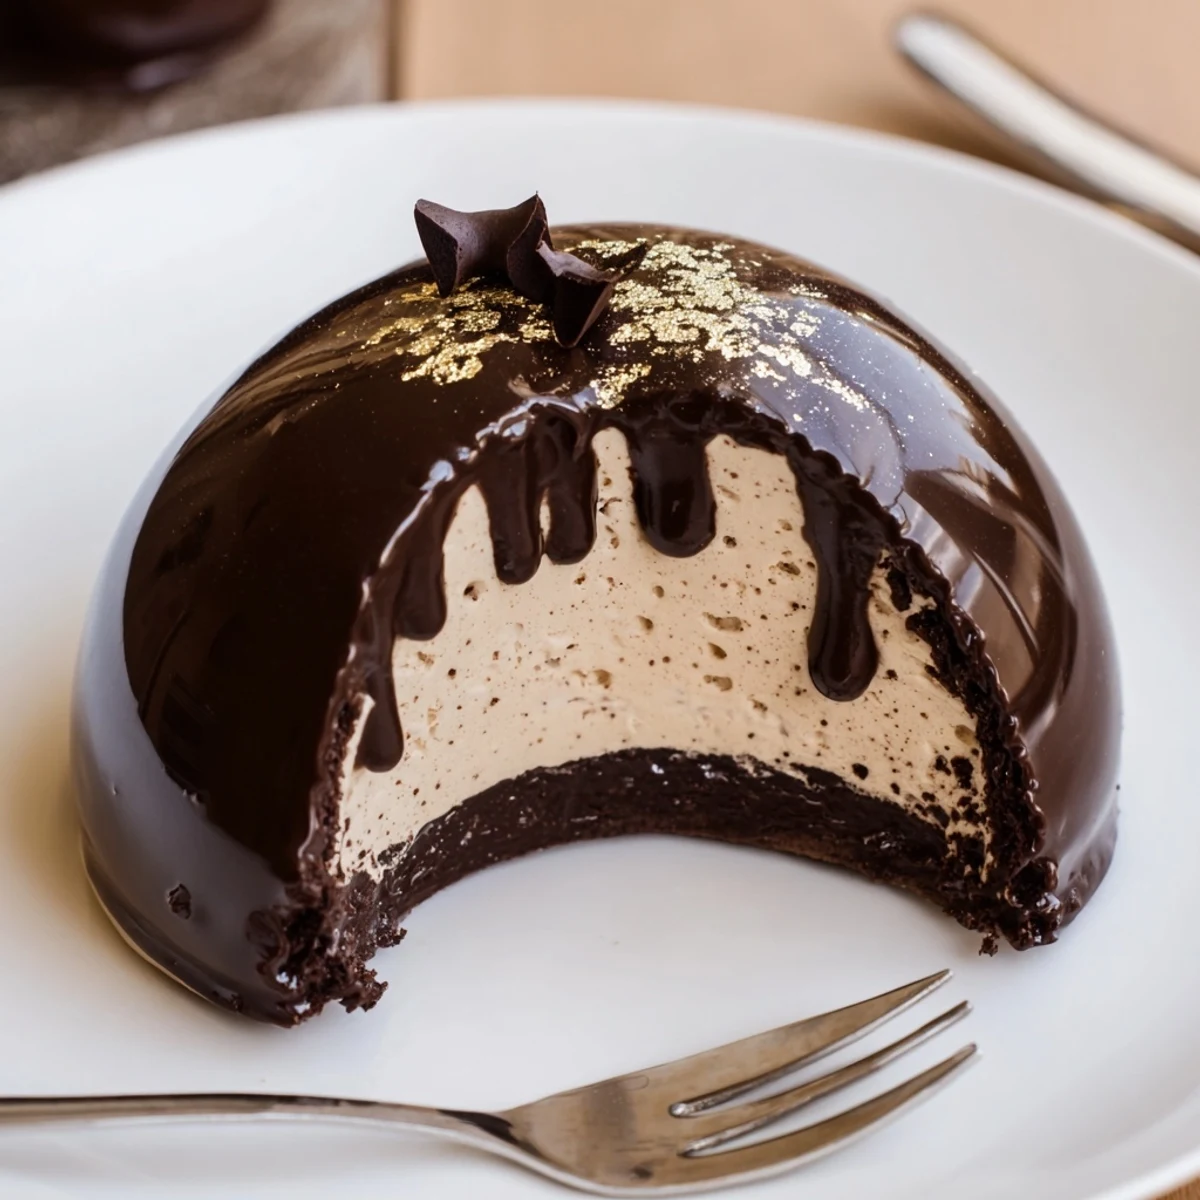
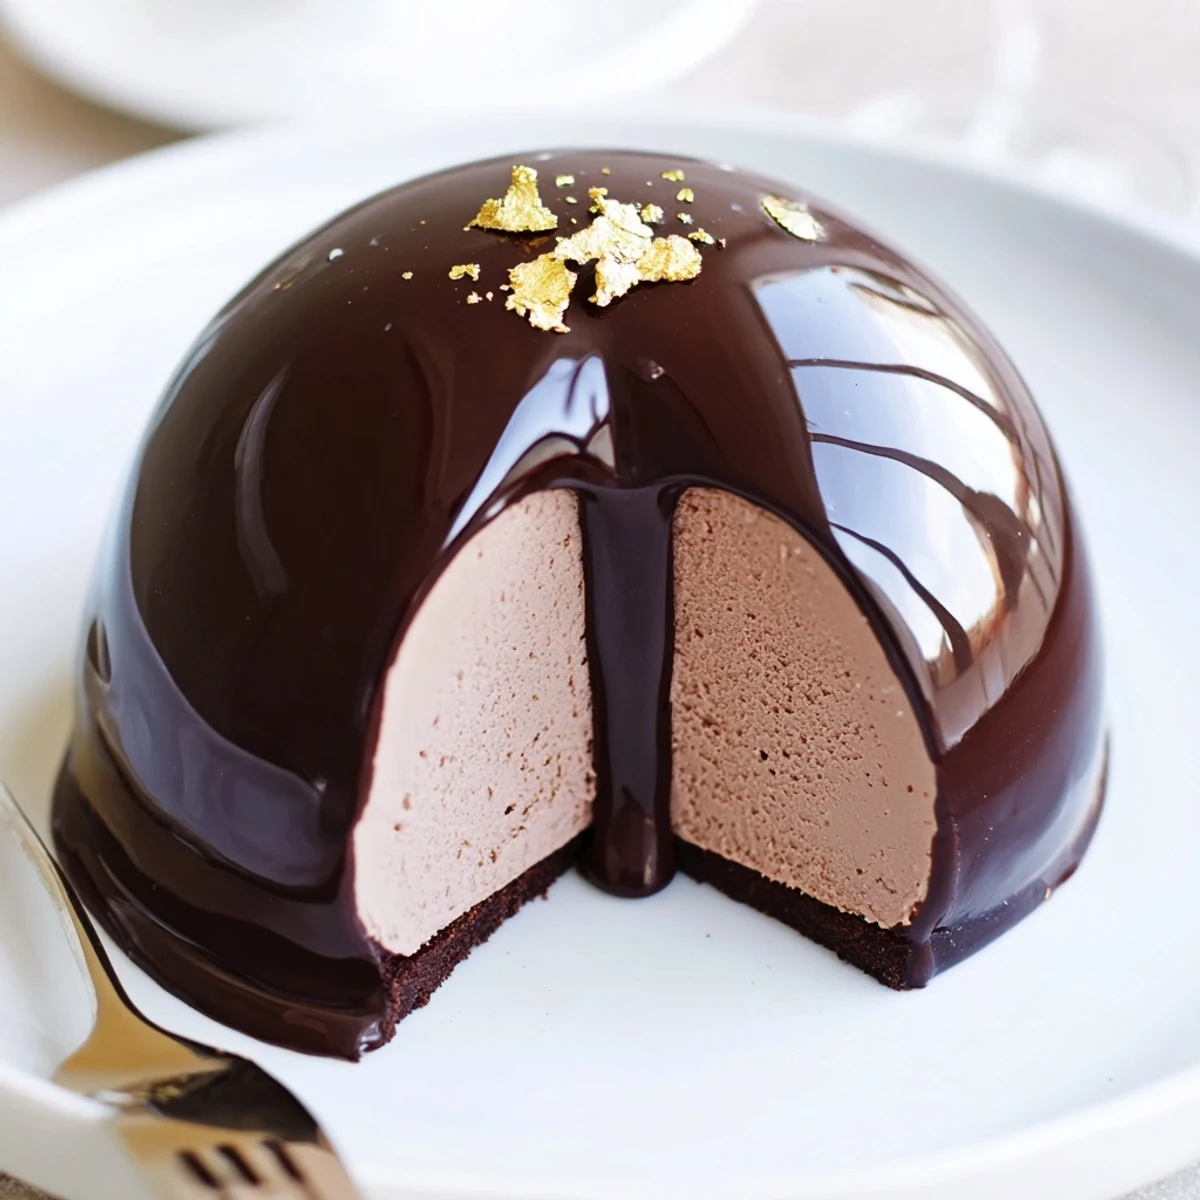
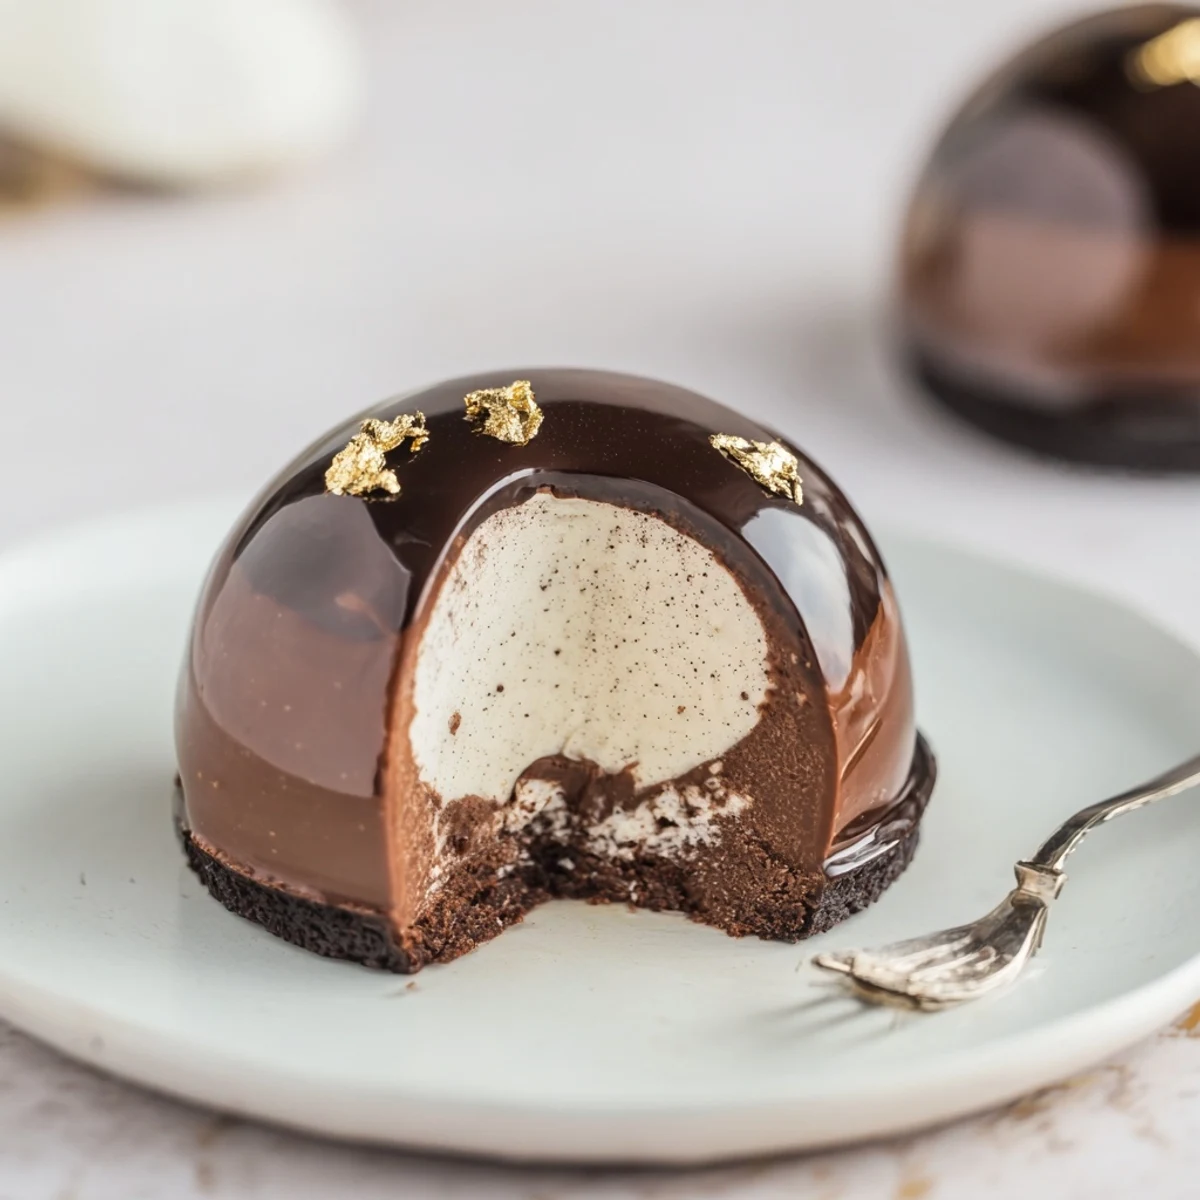
 This elegant chocolate mascarpone dome pairs a silky mascarpone mousse with thin, tempered dark chocolate shells. Gelatin stabilizes the mousse before chilling; domes are filled, set for several hours, then unmolded onto a wire rack. A warm chocolate mirror glaze cooled to around 32°C is poured to create a glossy finish. Chill briefly to set, then garnish with gold leaf, curls, or berries. Allow proper shell thickness and full setting time for clean release and maximum shine.
The first time I attempted these chocolate mascarpone domes the kitchen felt like a makeshift chocolate lab, my countertop dotted with silicone molds and smudges of glossy glaze. As the scent of melted dark chocolate filled the air I remember how the gentle sheen of the finished domes reflected the kitchen lights—almost too pretty to eat. Not every dome came out perfect: a few collapsed from my impatience, but that made the successful ones taste even sweeter. Even now when I unmold that first gleaming dessert I get a quiet thrill of anticipation.
I made these domes for a friend’s birthday dinner one stormy spring night—the rain drummed so hard on the windows we could hardly hear the music. But when I brought out the plates, everyone fell quiet, marveling at their own reflections in the impossibly shiny glaze. That shared sense of wonder stays with me: a dessert that turns a simple meal into an event.
Ingredients
- Dark chocolate (at least 60% cocoa): Deep flavor is essential here, and a higher cocoa content helps the shells pop out with a good snap.
- Mascarpone cheese: Keep it well chilled—the cool creaminess brings dreamy richness to the mousse.
- Heavy cream: Cold from the fridge, it whips up into soft clouds and blends to light perfection.
- Powdered sugar: Lends sweetness without any graininess; sift it to avoid lumps.
- Vanilla bean paste or extract: Vanilla rounds out the mascarpone, but a little goes a long way.
- Gelatin: Gives just enough structure for that neat slice, whether you use sheets or powder.
- Cocoa powder (for mirror glaze): Sift before using for superb smoothness in the finish.
- Optional decorations (gold leaf, chocolate curls, berries): These touches add luxury and a pop of color—add them right before serving.
Instructions
- The Chocolate Shells:
- Melt the dark chocolate gently, then brush or spoon a thick, even layer into each dome mold—get into every nook, then chill. Repeat for a second coat to anchor the shells, then let them set fully in the fridge.
- Whipping Up Mascarpone Mousse:
- Soften your gelatin, then whisk mascarpone, sugar, and vanilla until smooth. Fold in billowy whipped cream, then melt the gelatin and blend it swiftly into the mousse before it sets.
- Filling the Domes:
- Spoon or pipe the mousse gently into the chocolate-lined molds (leave a tiny space at the top), then smooth the surface. Chill them for at least three hours so everything firms up just right.
- Revealing the Domes:
- When set, pop each dome out of the mold carefully and place on a wire rack over a tray to catch any glaze drips.
- Mirror Glaze Magic:
- Soften gelatin, then simmer water, sugar, cream, and cocoa together while whisking—smell the chocolatey steam as it blends. Cool to 50°C, stir in gelatin, then let it reach 32°C so it pours in a perfect, glassy sheet.
- Finishing Flourish:
- Pour the glaze in one go over each dome and watch as it cloaks the mousse in a glossy coat. Gently move domes to plates with a spatula, add your favorite decorations, and chill to set for the grand reveal.
 Pin It
 There’s a special hush that falls when people take their first bite—a pause between admiration and the audible crack of chocolate under a spoon. That moment when eyes meet and smiles spread, that’s when this dessert turns from technical challenge into pure joy at the table.
Getting a Smooth Finish Every Time
If you want that glossy, Instagram-worthy effect, the glaze temperature is your golden ticket. I use a digital thermometer and always make myself wait for 32°C—those few moments of suspense are worth it for a glass-like shell that drapes perfectly over each dome.
Troubleshooting Common Dome Woes
When I first started, chocolate shells cracked or broke on unmolding more times than I care to admit. If your kitchen is warm, chill the molds a bit longer and handle them with cool, dry hands—it makes popping them out less nerve-wracking and a lot more successful.
Elegant Touches for Parties or Gifts
For special occasions, I add gold leaf or a single raspberry on top for a striking finish. A light dusting of cocoa or a curl of chocolate elevates the dessert without crowding the flavors.
- If you use fresh berries, dry them carefully to keep the glaze pristine.
- Let the finished domes come to room temperature for 10 minutes before serving.
- Extra glaze can be kept in the fridge and gently rewarmed for another showstopper dessert.
 Pin It
 This dessert never fails to inspire awe and conversation, even on a casual evening. Let yourself take pride in every shimmering dome—the process is as rewarding as the final bite.
Common Questions
- → How do I prevent the chocolate shells from cracking?
-
Work at a consistent temperature and apply multiple thin layers, chilling between coats. Ensure shells are thick enough to handle filling but not so thick they lose delicate bite; about two coats usually suffices.
- → What temperature should the mirror glaze be for pouring?
-
Cool the glaze to roughly 30–34°C (86–93°F). That range gives a fluid glaze that sets with a glossy finish without melting the mousse inside.
- → Can I substitute gelatin for a vegetarian option?
-
Yes. Use a plant-based gelling agent such as agar-agar, but adjust quantities and blooming/cooking steps: agar requires boiling and sets firmer, so test a small batch for texture and timing.
- → How long should the domes chill before glazing?
-
Chill the filled shells at least 3 hours, or until fully set. A firm mousse ensures clean unmolding and prevents deformation when the warm glaze is poured.
- → How can I get a smooth, even glaze coverage?
-
Place domes on a wire rack over a tray, pour in one steady motion from the center, and let excess drip off. Pouring at the correct glaze temperature and using a thin, fluid consistency yields the smoothest coverage.
- → Any tips for flavor variations?
-
Add a thin coffee-soaked sponge at the base for depth, fold in citrus zest for brightness, or switch to white chocolate shells and glaze for a different visual and flavor profile.