 Pin It
 Elevate your homemade pies with a stunning fishtail braid crust that rivals bakery-quality presentations. This decorative technique transforms ordinary pastry edges into intricate woven borders, perfect for special occasions or holiday gatherings.
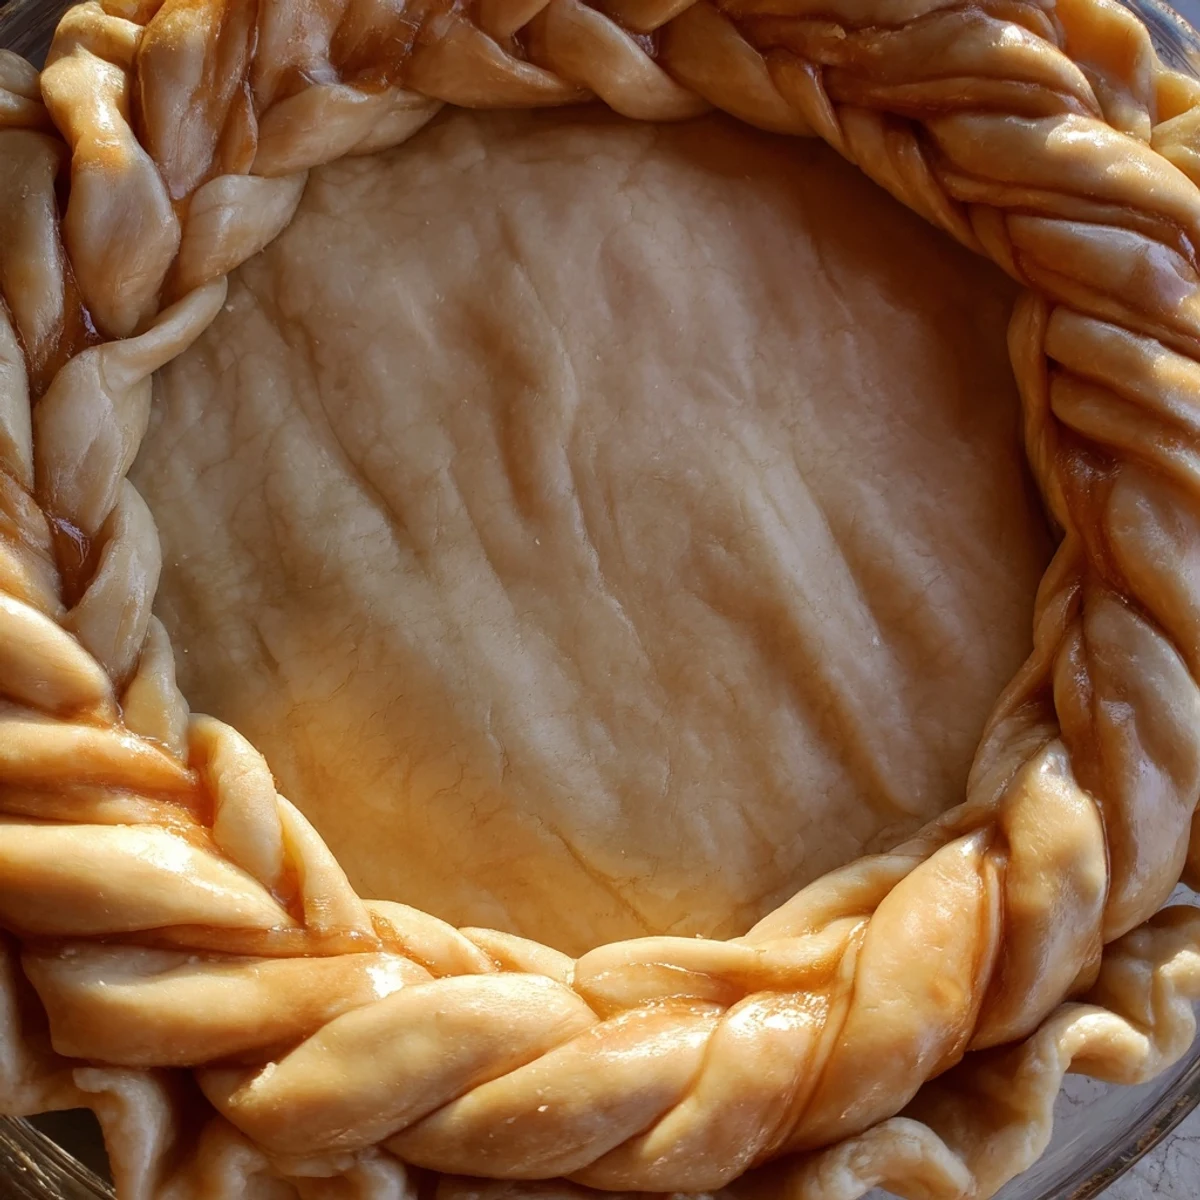
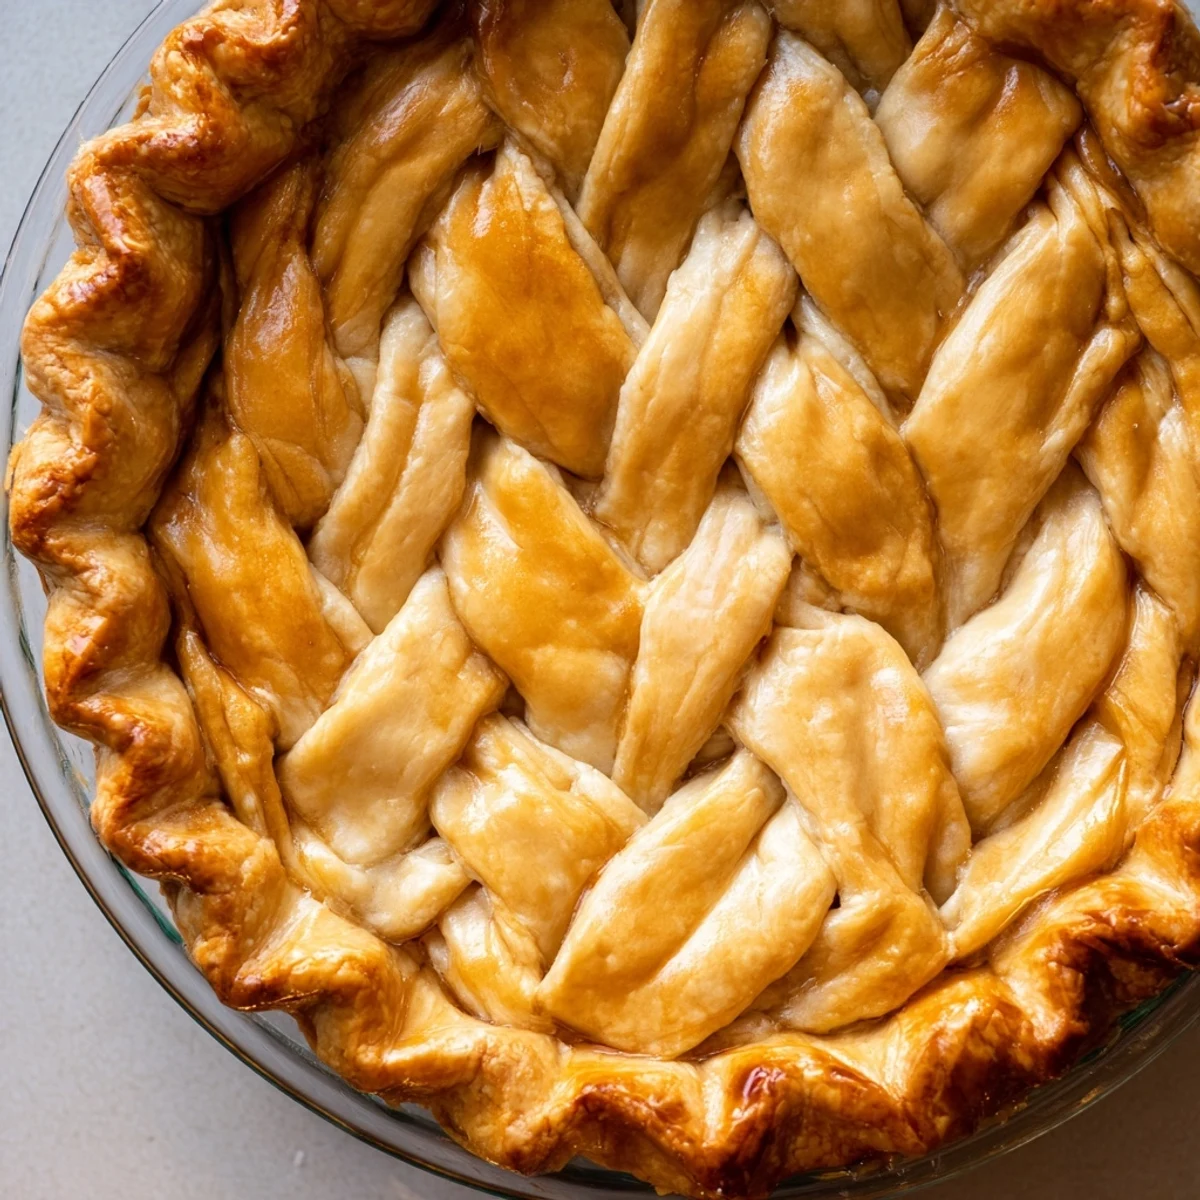
The process begins with classic pie dough—flour, cold butter, salt, sugar, and ice water—worked into a pliable pastry. After chilling, you'll roll and cut twelve even strips, then master the four-strand fishtail weaving pattern. Unlike standard crimped edges, this braid creates dimension and visual interest that immediately catches the eye.
Expect to spend about 30 minutes preparing and braiding, plus 15 minutes of blind baking to set the structure. The technique works beautifully with both fruit-filled custard pies and savory quiches. You can customize the dough with whole wheat flour for rustic character or add cinnamon to complement sweet fillings.
While the method requires patience and practice, the results are consistently impressive. The braided edge not only looks spectacular but also creates a substantial crust that holds fillings securely. Perfect for experienced bakers seeking to expand their decorative repertoire or anyone wanting to create a memorable centerpiece for their dessert table.
The first time I attempted a braided pie crust, my kitchen looked like a flour explosion zone. I was trying to impress dinner guests with what I thought would be a simple decorative touch, but I ended up with three tangled strips and a lot of laughter. Something about that challenge stuck with me though, and now fishtail braiding has become my favorite way to make ordinary pies feel extraordinary.
I made this apple pie for my sister's birthday last autumn, and she actually gasped when I pulled it from the oven. The way the braided edge caught the light, all golden and woven together like edible jewelry, made the whole kitchen feel warmer. She took photos before even taking a bite, which is really saying something for someone who loves food as much as she does.
Ingredients
- 2 1/2 cups all-purpose flour: The backbone of your crust, providing structure and that perfect tender flake
- 1 cup cold unsalted butter: Cold butter is nonnegotiable here, those tiny pockets of fat create the flaky layers we are after
- 1 tsp salt: Enhances flavor and balances the sweetness in your filling
- 1 tbsp sugar: A touch of sweetness helps the crust brown beautifully
- 6-8 tbsp ice water: The glue that brings everything together, add it slowly and trust your fingers
- 1 egg beaten with 1 tbsp milk: Your golden paint for that gorgeous bakery finish
Instructions
- Mix the dry ingredients:
- Whisk flour, salt, and sugar in a large bowl until everything is evenly distributed
- Cut in the butter:
- Work cold butter into the flour with your fingertips or a pastry cutter until you see coarse crumbs, some pea-sized butter chunks should remain
- Bring it together:
- Drizzle ice water while mixing gently, the dough should just hold together when squeezed, divide into two discs and chill for at least an hour
- Prepare your canvas:
- Roll one disc to fit your pie plate, press it in gently, trim the edges, and keep it chilled while you work on the braiding magic
- Create your strips:
- Roll the second disc to about 1/4 inch thickness and cut twelve even strips, roughly half an inch wide
- Master the fishtail braid:
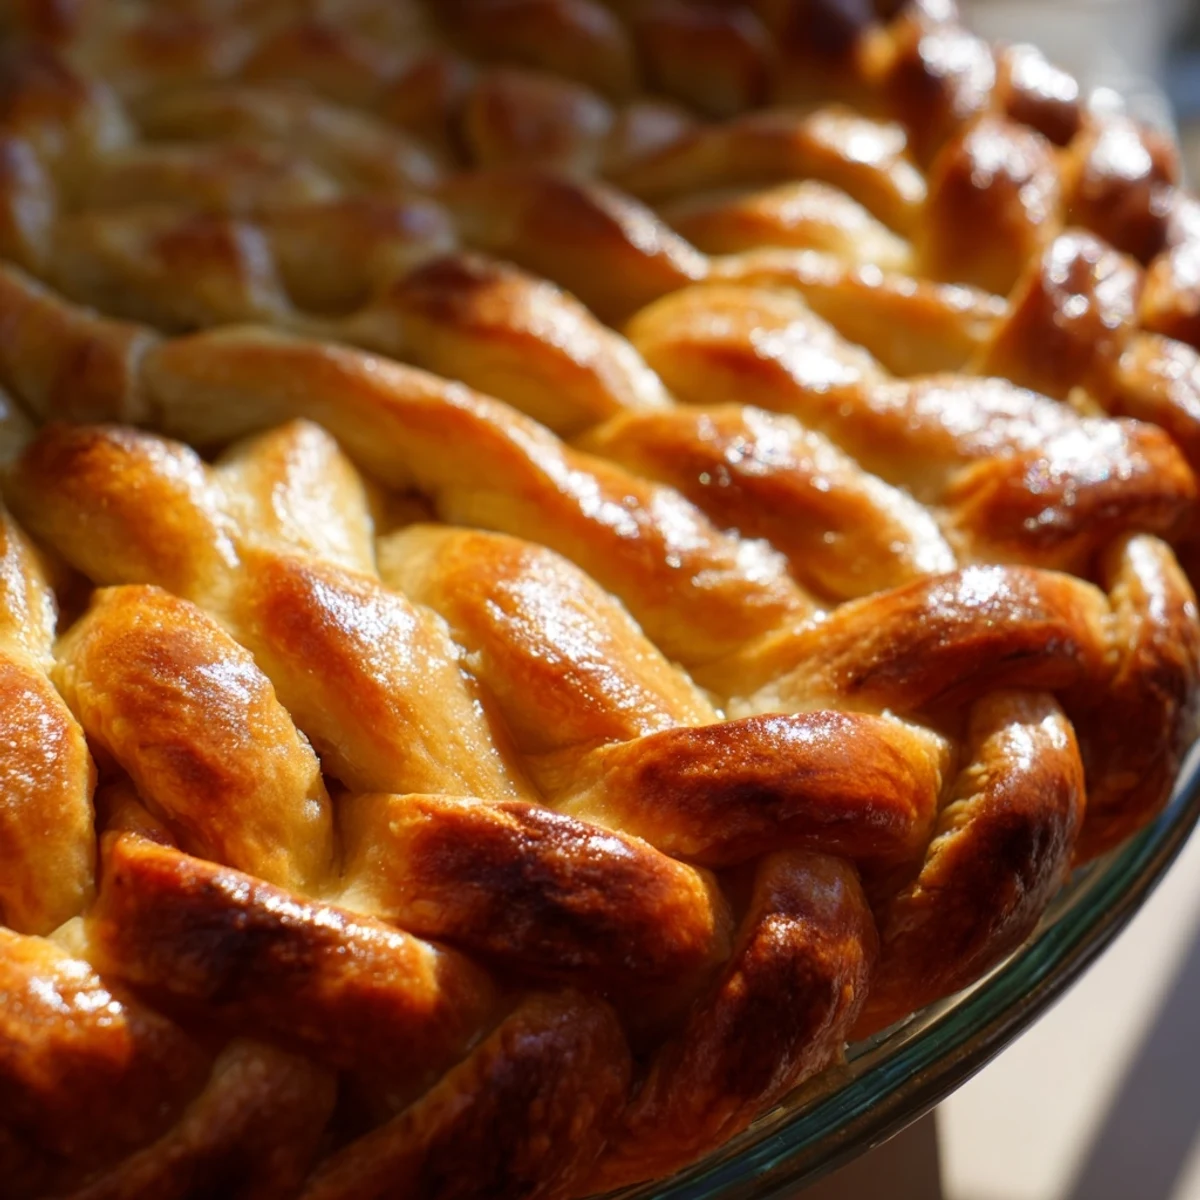
- Group strips into sets of four, pinch tops together, then cross the leftmost strip over and under until you reach the end, working with one set at a time
- Attach your masterpiece:
- Transfer braids to your chilled pie crust edge, pressing gently to seal, use a dab of water if needed to help them stick
- Chill again:
- Let the assembled pie rest in the fridge for 15 minutes while you preheat your oven to 400°F
- Give it some shine:
- Brush the braided edge with your egg wash mixture, getting into all those lovely crevices
- Bake to golden perfection:
- Bake for 12-15 minutes until deeply golden, filling and finishing time will depend on your chosen pie recipe
 Pin It
 There is something profoundly satisfying about serving a pie that looks this impressive. The way guests lean in closer to examine that woven edge, then their eyes light up when they realize you made it yourself, that moment alone is worth the effort.
Making It Your Own
I have found that adding herbs to the dough creates the most amazing savory crust variations. Fresh chopped rosemary, thyme, or even a pinch of garlic powder transforms this into something entirely unexpected. For sweet pies, a teaspoon of vanilla extract in the dough or a sprinkle of cinnamon sugar over the egg wash creates little moments of surprise.
Troubleshooting The Braid
Sometimes your strips will stretch unevenly or the braid feels loose, and that is completely normal. The beauty of pastry is that it is forgiving. If a strip breaks, just press it back together. If the braid looks messy, remember that egg wash hides a multitude of sins and golden brown makes everything look intentional.
Timing Is Everything
The chilling steps are not suggestions, they are what stand between you and a tough shrunken crust. Cold pastry relaxes the gluten, making it easier to work with and ensuring those beautiful flaky layers. I usually make my dough the night before, letting it rest in the fridge overnight for the most tender results.
- Plan ahead since the dough needs at least an hour to chill before rolling
- Keep a bench scraper handy for cleaning your work surface and lifting dough
- Practice the braiding motion with rope or yarn before committing to your pastry strips
 Pin It
 Every time I serve a pie with this crust, someone asks for the recipe, but really it is just a simple dough technique that makes ordinary moments feel special. Happy baking, friend.
Common Questions
- → What makes fishtail braiding different from regular three-strand braiding?
-
Fishtail braiding uses four strands instead of three, creating a flatter, wider woven pattern that resembles a fish's tail. The weaving technique crosses strips over and under in a specific sequence, producing intricate texture that's more substantial than standard braiding methods.
- → Can I make the braided edge ahead of time?
-
Yes, you can prepare the braided crust and freeze it before baking. Wrap the assembled pie tightly in plastic and foil, then freeze for up to two weeks. When ready to bake, add a few extra minutes to the blind baking time since you'll be starting from frozen.
- → What's the best way to prevent the braid from unraveling during baking?
-
Chill the assembled pie for at least 15 minutes before baking to firm the butter in the dough. Brushing the braids with egg wash helps seal edges, and using a small amount of water where braids meet the main crust creates a strong bond. Don't skip the chilling step—it's crucial for maintaining shape.
- → Does this technique work with gluten-free pie dough?
-
Gluten-free dough can be more fragile and challenging to braid, but it's possible with adjustments. Use a high-quality gluten-free flour blend designed for pastry, and work quickly while the dough is cold. Consider making slightly wider strips to prevent breaking, and handle with extra care during transfer.
- → Can I use this braiding method for savory pot pies?
-
Absolutely. The fishtail braid works beautifully for savory applications like chicken pot pies or vegetable tarts. Consider adding herbs like thyme or rosemary to the dough, or brushing with beaten egg and sprinkling with coarse salt or sesame seeds for extra flavor and visual appeal.
- → What if my braided strips break while I'm working?
-
If strips tear, gently press them back together. Small imperfections often disappear during baking as the pastry puffs and browns. Keep unused dough covered with a damp cloth to prevent drying, and work in a cool kitchen. If breakage is persistent, the dough may be too warm—return it to the refrigerator for 10-15 minutes.