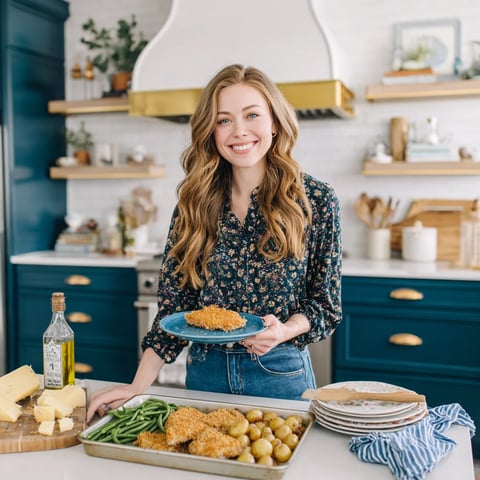
 Pin It
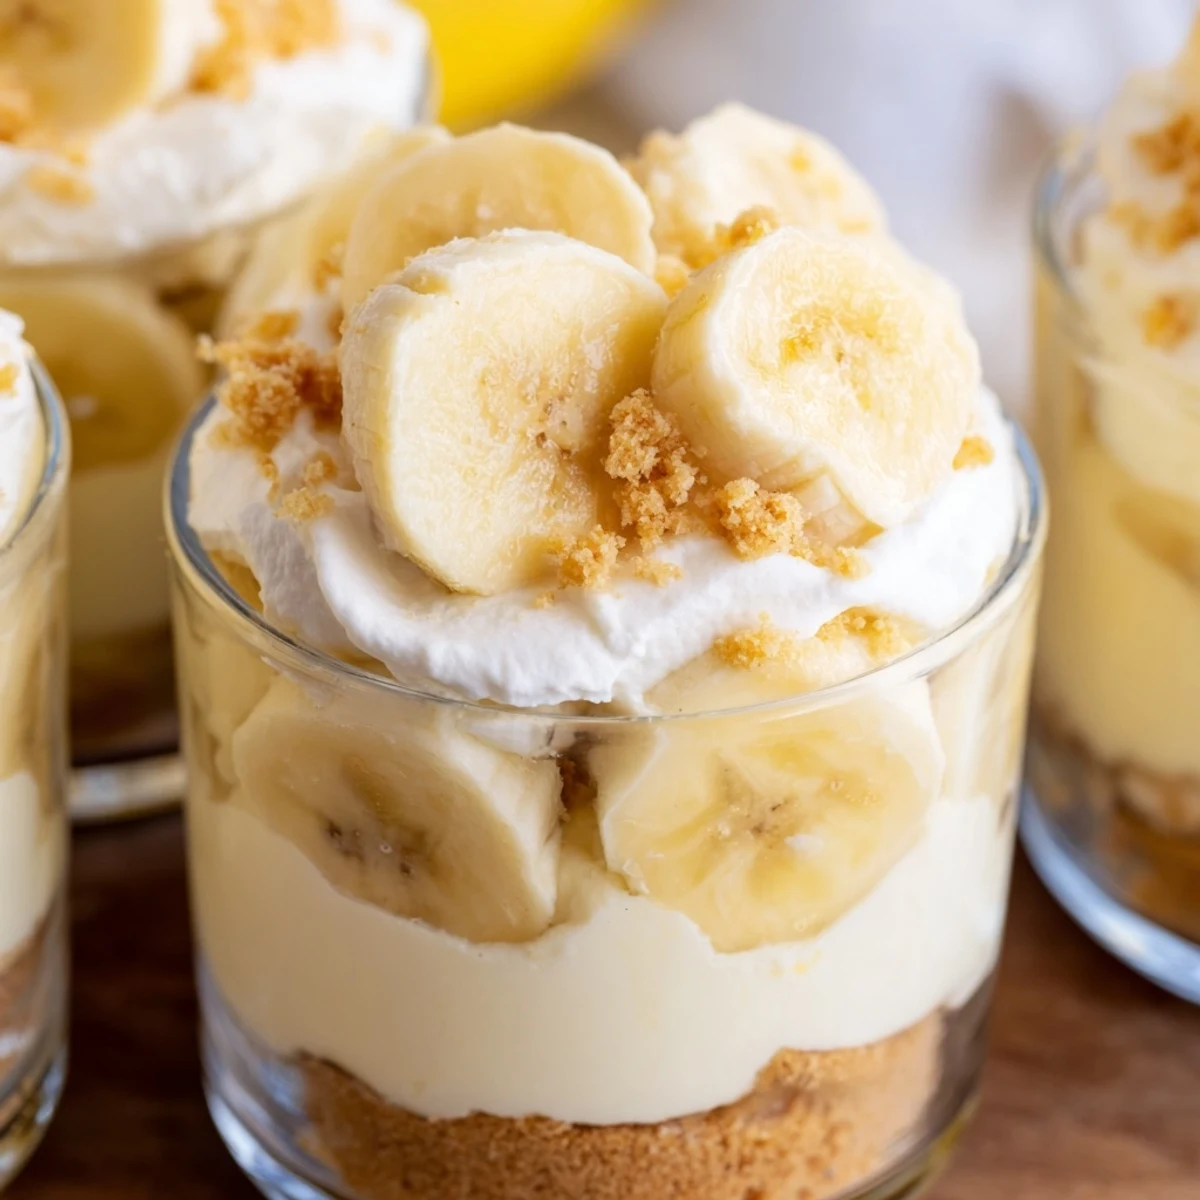
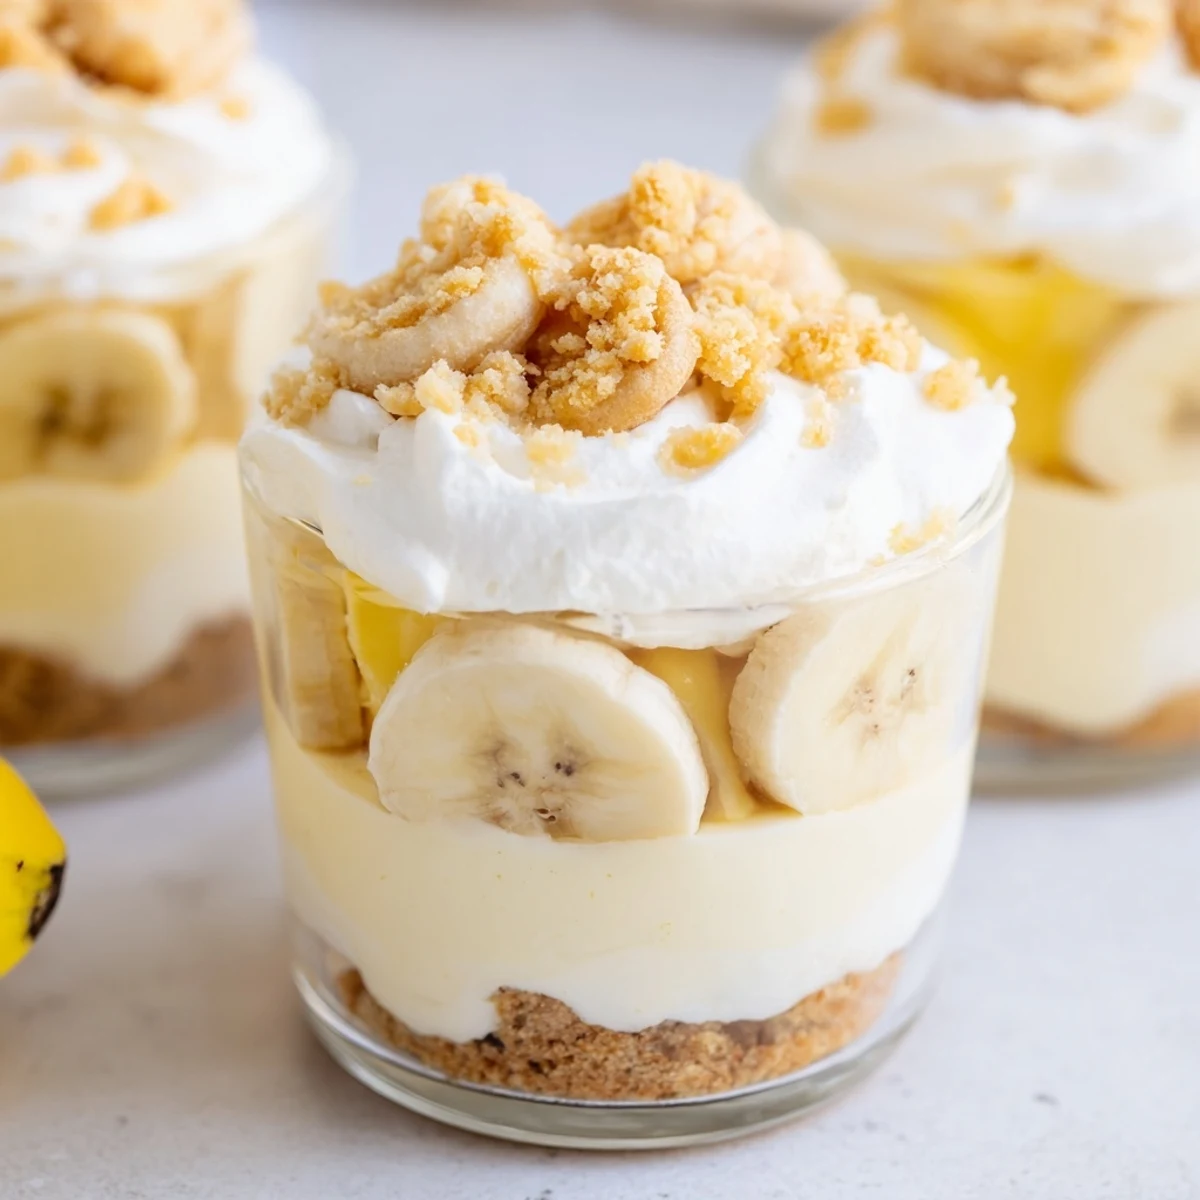
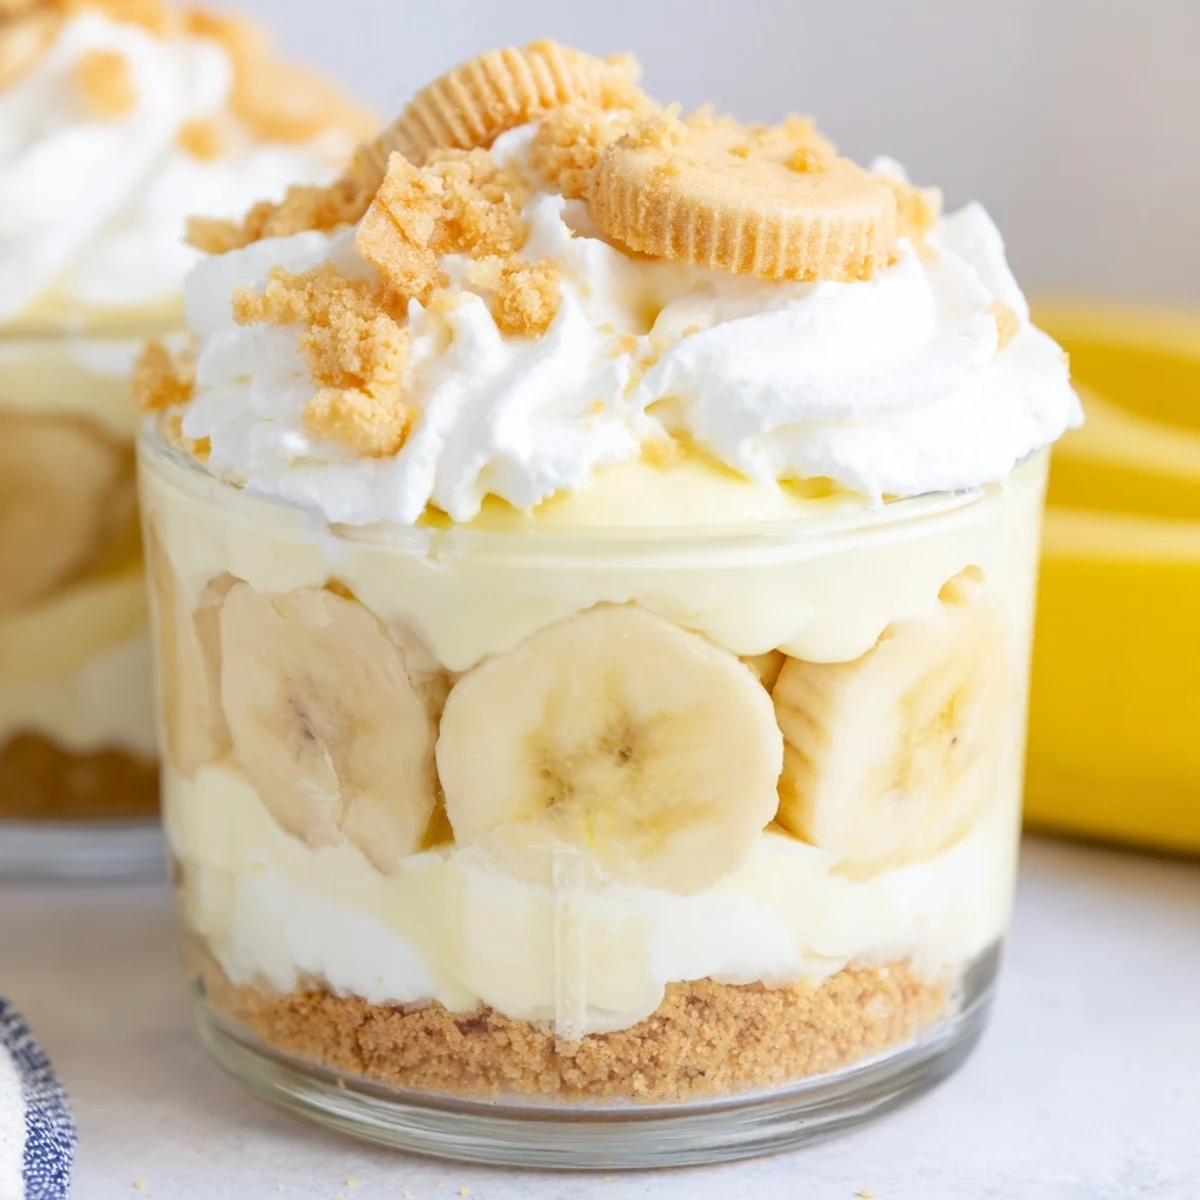
 These individual cups feature luscious layers of velvety cheesecake filling and classic banana pudding, all resting on a buttery vanilla wafer crust. Each cup delivers the perfect balance of creamy sweetness from the cheesecake, nostalgic banana flavor from the pudding layer, and satisfying crunch from the wafer crumbs. Fresh banana slices throughout add natural sweetness and texture, while the optional whipped cream topping makes these an elegant yet effortless dessert for gatherings or everyday treats.
My sister discovered these cups at a potluck last summer and called me that same night, breathless about how she'd eaten three before anyone else even got through the line. I made them the next weekend for a dinner party, and watching guests lean over their cups, scraping the spoons along the glass to get every last bite of that creamy banana-cheesecake marriage—that's the kind of quiet kitchen victory that sticks with you. The best part? No oven required, which means no heating up the kitchen when it's already eighty degrees outside.
I brought these to a friend's birthday picnic once, and the birthday girl literally licked her cup clean before laughing and admitting she'd never done that in public before. Something about the individual servings makes people feel like kids again, like they're getting away with something indulgent and personal. Plus, watching people discover those layered textures—the crunch against the cream against the soft banana—is its own kind of entertainment.
Ingredients
- 1 cup vanilla wafer cookies, crushed: These Nilla wafers are non-negotiable for that authentic childhood flavor, and crushing them yourself gives you the perfect texture control
- 2 tbsp unsalted butter, melted: Just enough to bind the crumbs together without making them greasy or heavy
- 8 oz cream cheese, softened: Let it sit out for a full hour—cold cream cheese creates lumps that no amount of mixing can fix
- 1/3 cup granulated sugar: This modest amount sweetens without masking that tangy cheesecake brightness
- 1 tsp pure vanilla extract: The real stuff here, not imitation, because vanilla needs to sing against the banana
- 1 cup heavy whipping cream, cold: Use it straight from the fridge, and chill your bowl too for the fluffiest whip
- 1 package instant banana pudding mix: The 3.4 ounce box gives you that unmistakable banana flavor without mashing fresh fruit into the pudding layer
- 1 1/4 cups cold whole milk: Whole milk creates the richest pudding, and it must be cold or the texture never sets properly
- 2 ripe bananas, sliced: Look for bananas with some brown spots—they're sweeter and creamier than bright yellow ones
- Additional vanilla wafer crumbs, fresh banana slices, whipped cream: These toppings aren't optional for the full experience, though the whipped cream can be skipped if you're watching richness
Instructions
- Build your foundation:
- Combine those crushed vanilla wafers with melted butter in a small bowl, mixing until every crumb is evenly coated and it holds together when you squeeze a handful. Spoon about two tablespoons into each serving cup and press down gently with the back of your spoon to create a firm, even crust layer.
- Make the cheesecake base:
- Beat that softened cream cheese, sugar, and vanilla together with a hand mixer until you've got something silky smooth—no grainy bits allowed. This takes about 2 to 3 minutes, and don't be tempted to rush it.
- Whip the cream:
- In a separate chilled bowl, whip that cold heavy cream until stiff peaks form—you know you're there when you can turn the bowl upside down and nothing moves. Gently fold this cloud of cream into your cheesecake mixture until no white streaks remain.
- Prepare the pudding layer:
- Whisk the instant banana pudding mix with cold milk for a full 2 minutes, or until it's noticeably thickened. Let it sit for about 5 minutes while you gather your cups and toppings.
- Start the layers:
- Spoon about half your cheesecake mixture over the crust in each cup, spreading it gently to create an even layer. Arrange some fresh banana slices on top—this banana layer is crucial for that authentic banana pudding experience.
- Add the pudding:
- Divide your thickened banana pudding among the cups, spooning it carefully over the banana slices so you don't disturb the layers beneath. Take your time here—messy layers still taste delicious, but neat ones are Instagram-worthy.
- Finish with cheesecake:
- Top each cup with the remaining cheesecake mixture, spreading it to the edges to seal everything in. Now sprinkle with extra vanilla wafer crumbs, add more banana slices, and crown with whipped cream if you're feeling indulgent.
- The waiting game:
- Cover your cups and refrigerate for at least 2 hours—this isn't optional. The flavors need time to meld and the layers to set, or you'll end up with something delicious but sad and soupy.
 Pin It
 My mom usually claims she doesn't like dessert, but the first time she tried these, she ate two cups and then asked if there were any leftovers she could take home. Something about that combination—part nostalgic childhood treat, part sophisticated cheesecake—works on practically everyone.
Making These Your Own
I've experimented with adding a teaspoon of cinnamon to the crust mixture, which gives these cups a subtle warmth that plays beautifully with the banana. Some friends swear by a splash of dark rum in the cheesecake layer for an adult dinner party version. You could also swap the vanilla wafers for graham crackers if you want something more traditional, though you'll lose that classic banana pudding flavor profile.
Serving Suggestions
Clear glass cups or jars are essential here because those layers are half the visual appeal. I use inexpensive parfait glasses from the discount store, and they've held up through countless parties and dishwasher cycles. Set up a little toppings station—extra whipped cream, maybe some crushed nuts, chocolate shavings—and let guests customize their final layer. It turns dessert into a fun interactive moment.
Storage And Make-Ahead Tips
You can assemble the entire cups except the fresh banana topping up to 24 hours in advance—cover them tightly with plastic wrap pressed directly onto the surface to prevent a skin from forming. The crust will soften slightly overnight, which some people actually prefer because it becomes almost cake-like. If you're making these for a special occasion, do yourself a favor and prepare everything the day before.
- Always slice your bananas immediately before serving, or toss them in lemon juice to prevent oxidation
- If transporting these, place them in a cupcake carrier or secure them in a box with crumpled paper towels to prevent tipping
- These freeze surprisingly well for up to a week without the fresh toppings—thaw in the fridge for 4 hours before serving
 Pin It
 There's something deeply satisfying about serving dessert that feels fancy but required zero oven time and minimal effort. These cups have become my go-to for every occasion from summer barbecues to winter holiday parties—always the first to disappear, never any leftovers to pack up.
Common Questions
- → Can I make these cups ahead of time?
-
Yes, these cups can be prepared up to 24 hours in advance. Store them covered in the refrigerator and add fresh banana slices and whipped topping just before serving to prevent browning.
- → What type of cups work best for serving?
-
Clear glass cups, mason jars, or dessert dishes work beautifully as they showcase the attractive layers. Any 6-8 ounce vessel will work perfectly for these individual portions.
- → How do I prevent the bananas from turning brown?
-
Toss sliced bananas lightly in lemon juice before adding them to the cups, or add them just before serving. You can also arrange them on top of the final layer rather than in the middle.
- → Can I use homemade pudding instead of instant?
-
Absolutely! Cooked vanilla pudding with mashed banana stirred in works wonderfully. Allow it to cool completely before layering to maintain the distinct texture of each layer.
- → What's the best way to crush the vanilla wafers?
-
Place wafers in a zip-top bag and crush with a rolling pin, or pulse them in a food processor until fine crumbs form. For the crust, you want a fine, even texture.
- → Can I freeze these cheesecake cups?
-
While possible, freezing may affect the texture of the fresh bananas and pudding layer. For best results, enjoy these chilled within 2-3 days of preparation.