 Pin It
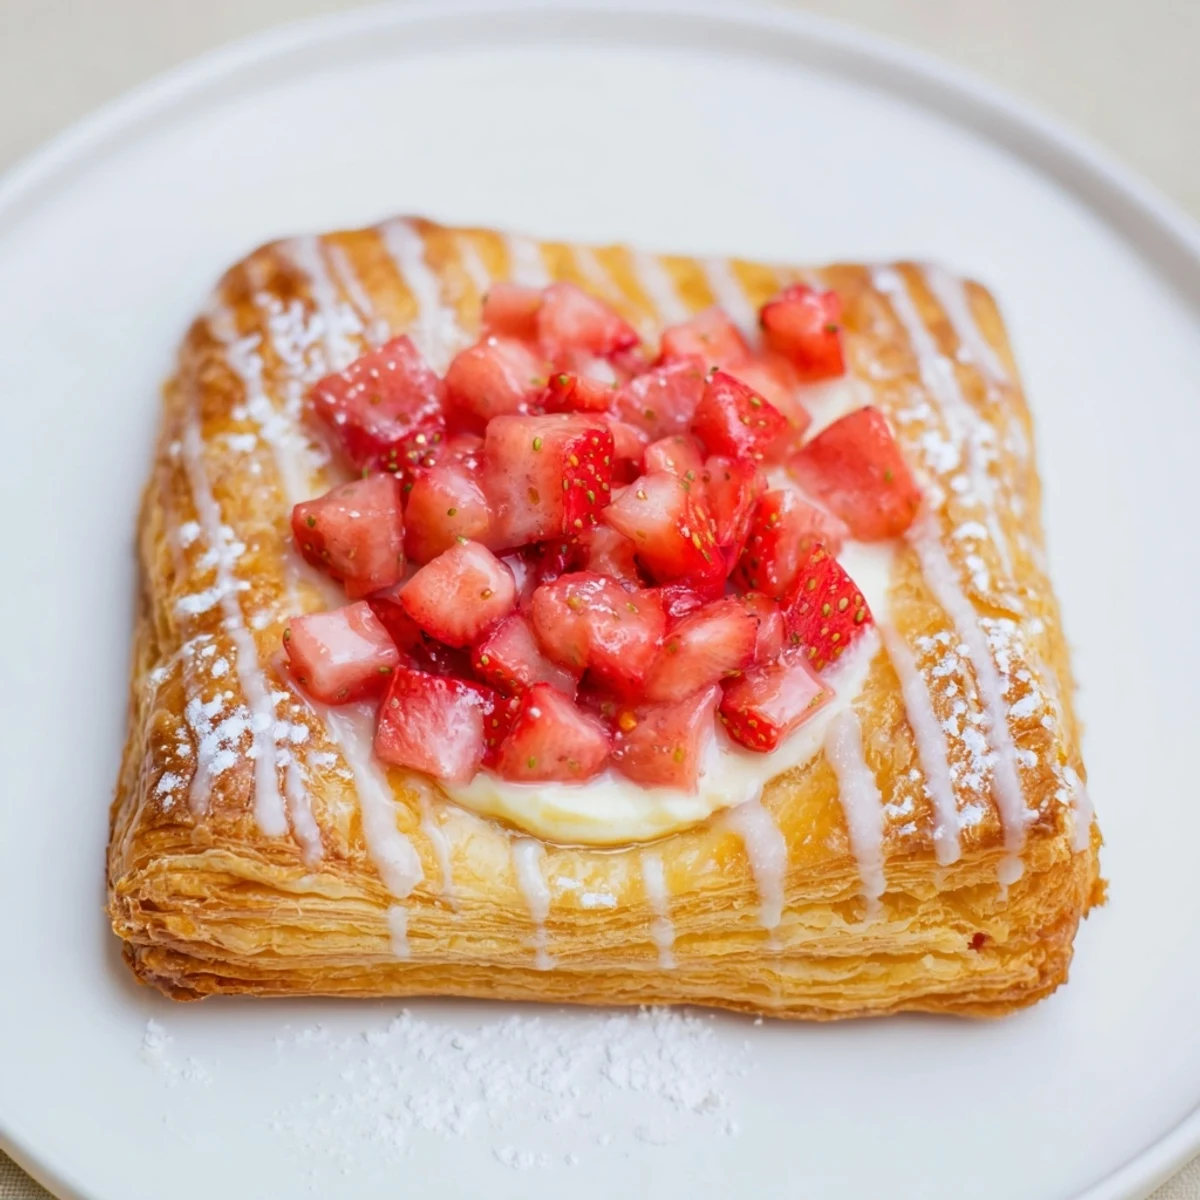
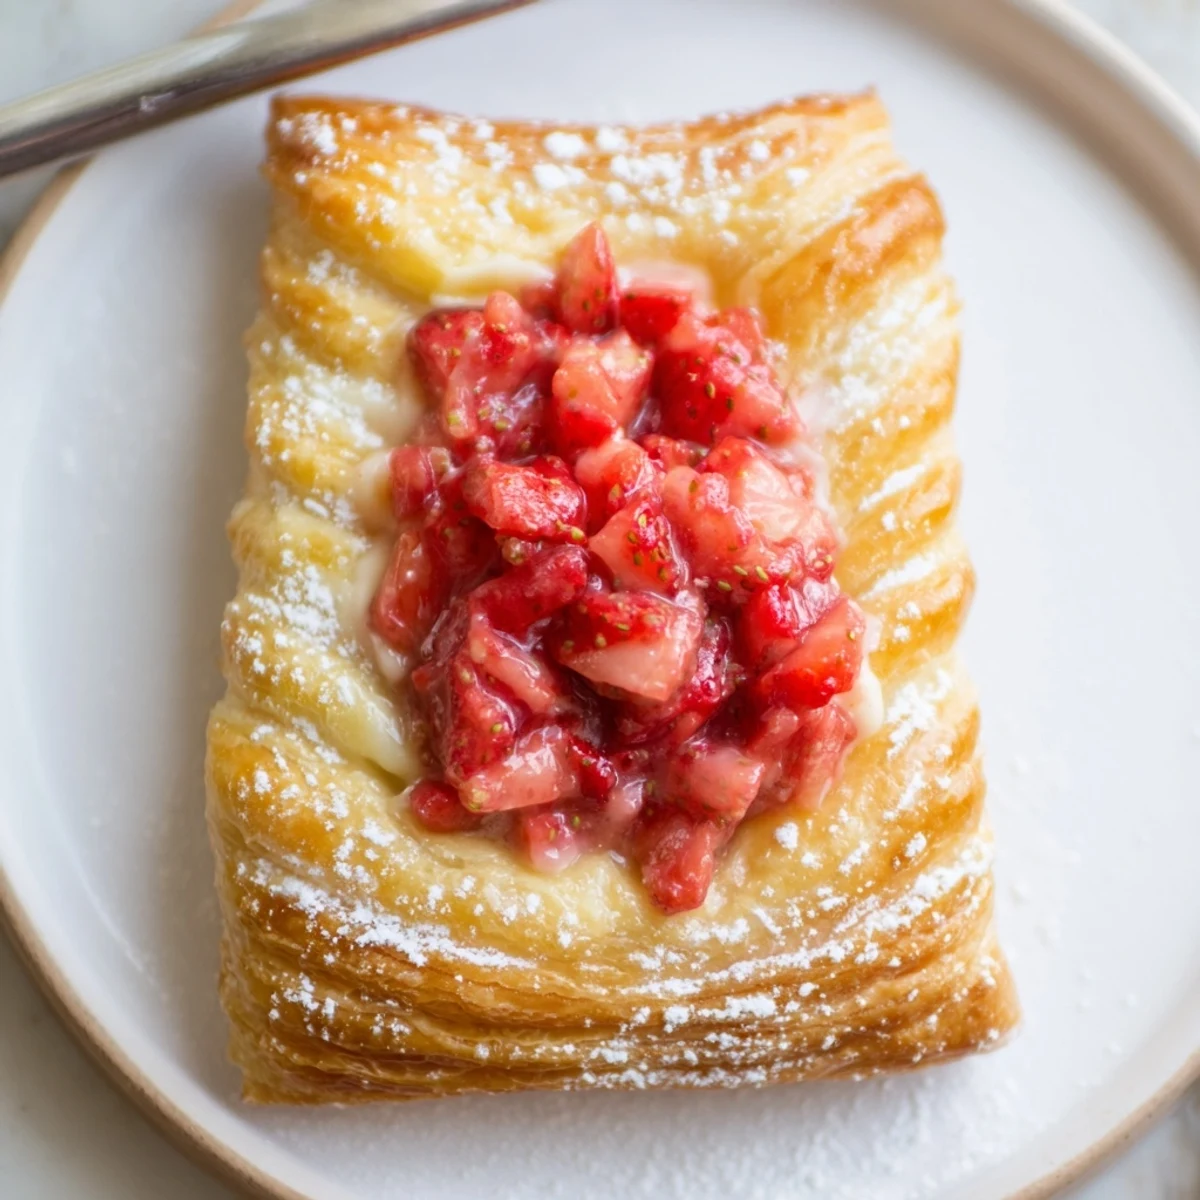
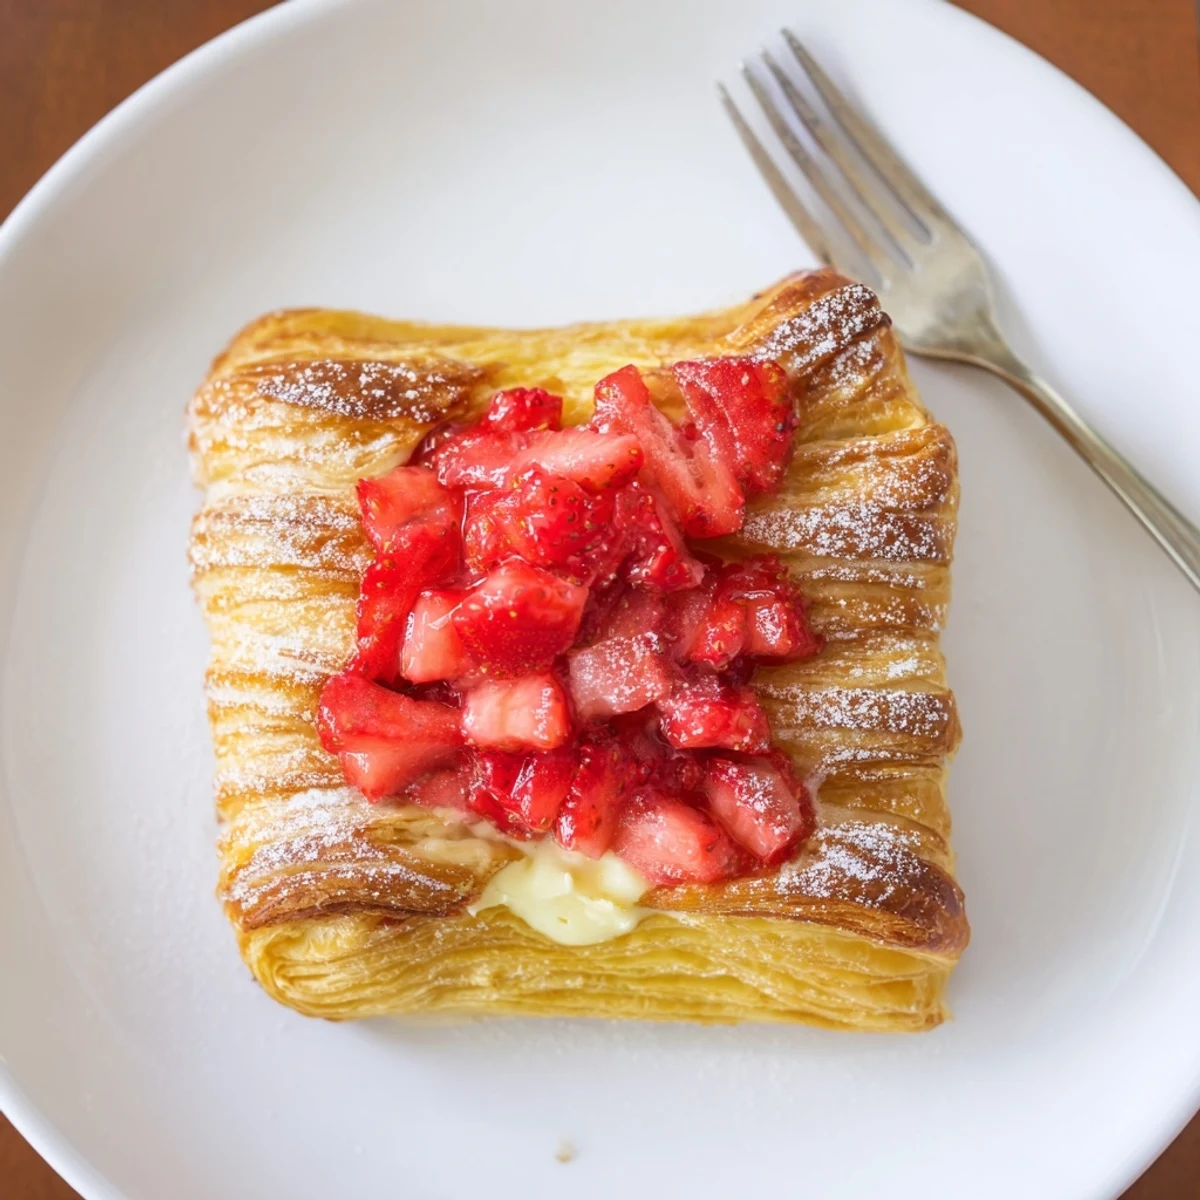
 Assemble 8 pastries by spreading a smooth cream cheese mixture on puff pastry squares, topping with a lightly sugared strawberry filling, and scoring a 1 cm border to create a raised edge. Brush with egg wash and bake at 200°C (400°F) for 18–22 minutes until puffed and golden. Cool slightly, then drizzle a simple powdered sugar glaze if desired. Prep about 25 minutes; total time ~45 minutes.
One late spring morning, the scent of fresh strawberries practically called to me from the kitchen counter. I decided to forgo my usual breakfast routine and try my hand at making Strawberry Danishes. As the pastries baked, the gentle hiss from the oven and a buttery aroma seemed to promise something special. It was one of those impulsive cooking moments that turned out better than planned.
Once, I made these for a brunch with friends who arrived earlier than expected. Rushing, I still managed to assemble everything in time, and their laughter filled the room as we drizzled glaze over warm, golden Danishes, not bothering to wait for them to cool. It turned our casual get-together into something just a little bit magical.
Ingredients
- Puff pastry sheet: Using store-bought makes this recipe breezy, but let it thaw just until pliable – too soft and it becomes tricky to cut.
- Cream cheese: Letting it soften at room temperature helps to avoid lumps in your filling.
- Granulated sugar: Sweetens both the cheese and strawberries just enough without overpowering their flavors.
- Vanilla extract: Adds warmth and depth to the creamy layer with just a splash.
- Lemon zest: This bright accent lifts the cheese filling – zest with a light hand to avoid bitterness.
- Fresh strawberries: Nothing beats the flavor or the vibrant color they bring, but drier berries are best so the pastry doesn’t get soggy.
- Lemon juice: A squeeze wakes up the strawberries and balances the sweetness.
- Cornstarch: Helps the strawberry juices thicken and stay neatly on the pastry instead of running wild.
- Egg: Mixed with milk for a glossy finish – it’s the secret to that bakery-style shine.
- Milk: Blends with the egg for the wash and also for the glaze – use just enough to drizzle easily.
- Powdered sugar: Essential for that simple, sweet glaze that sets prettily on top.
Instructions
- Heat Things Up:
- Switch on your oven to 200°C (400°F) and lay parchment on your baking tray so the Danishes slide off beautifully later.
- Mix Up the Cheese Filling:
- Whip the softened cream cheese, sugar, vanilla, and zingy lemon zest in a bowl until the mixture turns creamy and glossy, then pause to sneak a small taste.
- Freshen the Berries:
- Toss your diced strawberries with sugar, a splash of lemon juice, and cornstarch – it’ll turn glossy as the sugar draws out those sweet juices.
- Shape Your Pastry:
- Unfold the pastry sheet, roll gently if needed, and cut into 8 squares. With a small knife, score a slim border around each square to help the edges rise up around the filling.
- Fill the Centers:
- Spoon about a tablespoon of the cheese filling into each square, spreading it inside the border without pushing out too far.
- Add Strawberries:
- Crown each mound of cream cheese with a spoonful of the freshly prepared strawberry mix.
- Brush and Bake:
- Quickly whisk the egg with milk and brush it along the exposed pastry borders for color and shine. Slide into the oven for 18–22 minutes, watching for the pastry to pop up and take on a deep golden hue.
- Cool It Down:
- Once golden, lift them onto a rack and resist eating straightaway; a few minutes’ rest helps everything set.
- Add the Glaze (Optional):
- Mix powdered sugar, milk, and vanilla until smooth and sweep it over cooled Danishes for a little extra sparkle.
 Pin It
 There’s this memory of standing with my family, each of us reaching for the slightly misshapen Danish that never quite held its filling. Somehow, those imperfect pastries tasted all the better as we laughed at our eager, sticky fingers.
Making It Your Own
I’ve swapped in raspberries and even blueberries when strawberries were out of season – the key is not to be afraid of a little mess. Every batch seems to pick up a slightly new personality depending on what’s in my fruit bowl and mood that morning.
Getting That Flaky Finish
You don’t want your puff pastry to get too soft while prepping – colder dough puffs better and is less prone to stretching unevenly. It makes all the difference in achieving pastries that are crisp and light rather than limp.
Little Shortcuts That Work Wonders
Occasionally, I pre-make the fillings the night before which turns breakfast into an easy assembly job and saves me from morning rush stress. Keep your sheet of pastry loosely covered in the fridge until you’re ready to assemble and bake.
- Freeze extra pastries and reheat in the oven for a practically fresh treat anytime.
- A squeeze of lemon over the finished pastries adds a tart sparkle.
- Always check the bottom for doneness – they should feel crisp to the touch.
 Pin It
 Even on busy days, there’s something wonderfully rewarding about baking these from scratch. The delicate layers, creamy centers, and bright fruit always feel like a celebration, no matter the time or place.
Common Questions
- → How do I prevent a soggy bottom?
-
Drain excess liquid from the strawberry mixture and toss with a bit of cornstarch to bind juices. Keep the cream cheese layer compact and score a raised border in the pastry to help contain moisture while baking.
- → Can I use frozen strawberries?
-
Yes. Thaw fully, drain any released liquid, and squeeze out excess moisture before tossing with sugar and cornstarch to avoid a watery filling.
- → How can I make the cream cheese filling smoother?
-
Soften the cream cheese to room temperature and beat with sugar, vanilla, and lemon zest until silky. Use a spatula to press out lumps for an even spread.
- → What oven temperature and baking time work best?
-
Preheat to 200°C (400°F). Bake for 18–22 minutes, watching for a fully puffed, golden exterior. Rotate the tray once if your oven heats unevenly.
- → Can I prepare these ahead of time?
-
Prepare and assemble, then refrigerate on the tray for up to a few hours before baking. Fully baked pastries can be cooled, wrapped, and frozen; reheat in a moderate oven until crisp.
- → How do I get a shiny, golden edge?
-
Brush the pastry borders with an egg wash (one beaten egg mixed with a tablespoon of milk) right before baking to achieve a glossy, deep golden finish.